Thursday, June 3, 2010

Jeans... Continued...

In addition to a studded pair of shorts, I also made a studded denim vest with leather shoulders.

Materials Needed:
Small studs
Leather belt left over from last project (minus the studs)
Levis denim jacket
Needle
Thread

The first step was to take the denim jacket and remove the sleeves by either cutting or using a seam ripper.


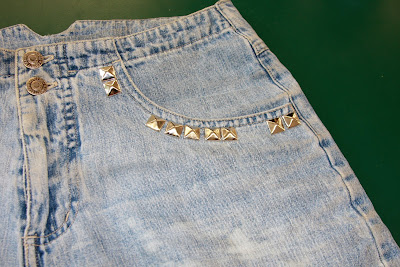
After that is done, you can place the studs on the front pockets and the collar. You can choose to place them elsewhere but this is how mine turned out:


After studding the denim vest, I took the belt leftover from the last jean project and cut it in half, removing the ends (buckle, etc). I sewed them into the shoulders to toughen it up even more.


Leg Jewelry

Who said chains are only for your neck and wrists? Lately, we have been seeing different forms of body jewelry in particular, leg jewelry. Lauren Santo Domingo was spotted sporting one of Litter's chain garters at New York Fashion Week, and Chanel's spring 2010 show included leg jewelry that was tattooed on (temporary of course). 
 
We DIY'ed our own leg jewelry using silver chain, feathers, a pair of needlenose pliers, wire clippers, 26 gauge wire (to wrap around the feather). We added a feather to one of our pieces, but you can be creative and use whatever you like.
 

Studded Jeans

Lately, a lot of attention has been put on jeans and studs. From a tough, bleached, and embellished look:

Balmain Spring 2009


To ChloƩ's softened up spring 2010 all jean look:


I wanted to try this out for myself, and the pictures that really inspired me were these, by Tommy Ton from Jack & Jil.


These are actually from BESS which has a wide range of studded jeans. They can be found here for approximately $275.

I started off with a basic pair of high waisted shorts for the summertime and cut them off a little shorter for a more frayed effect.


I then took a studded belt, like the one below, and removed all the studs by hand.


After this long and arduous process, I placed some studs onto the pockets by pulling the prongs apart, sticking them through the jeans, and closing them back up. Although they are harder to work with than studs you might glue on, they last a lot longer.


After the front was done, I did the back pocket by ripping half of the seam out so that there would be a flap as shown above. Then I put in rows and rows of studs until the whole pocket was covered.


The final step was to bleach the shorts for a more deconstructed and worn look. I did this by simply taking a sponge with Clorox Bleach on it and pressing it onto the shorts in different areas making sure that it was a little splotchy.
The end result was:

Front


Back